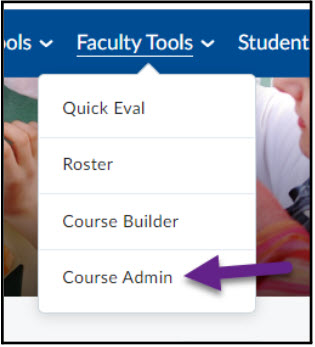
- In your course, go to Faculty Tools and select Course Admin
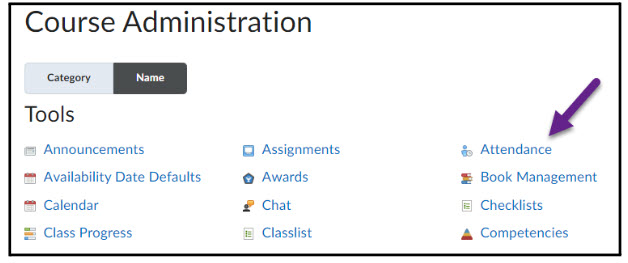
- Select Attendance.
- Using this tool, you will need to do two tasks:
- Create or select a scheme and
- Create the student register.
Creating or Selecting an Attendance Scheme
First, you will need to create or select an attendance scheme that outlines whether students are present, absent, late, leave early, excused, and or other attendance statuses that you would like to track.
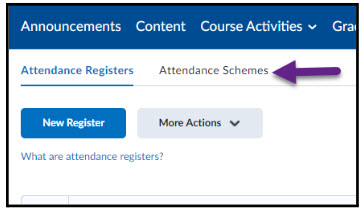
- To get started, select the Attendance Schemes tab.
- You will want to create a “New Scheme,” but you can view other schemes by pulling down a chevron. For example, SUNY Sullivan has set a scheme that includes multiple levels for noting attendance status and the weighted percent for each status. You may have a different set of criteria for attendance status.
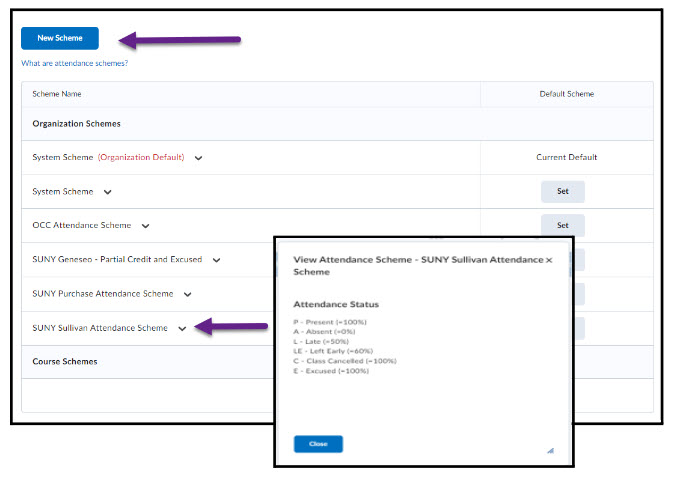
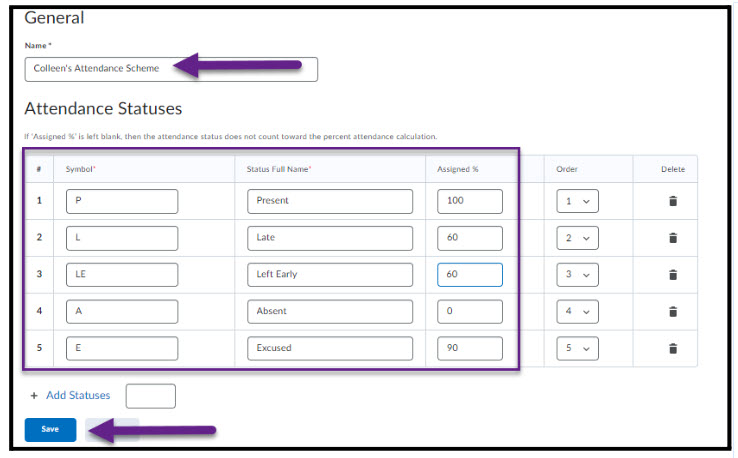
- You can set your own scheme or copy another SUNY’s scheme for your use. To create a “New Scheme” enter the name of the scheme and complete the “Attendance Statuses” with Symbol, Status Full Name, and Assigned %, then Save, the Close.
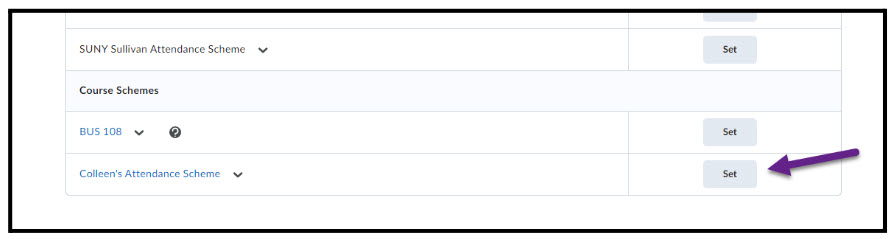
- Set the scheme you created or that you want to use. Note that the scheme you create can be copied into your other courses (organizational schemes are set by the Brightspace administrators of those SUNYs).
Creating an Attendance Register
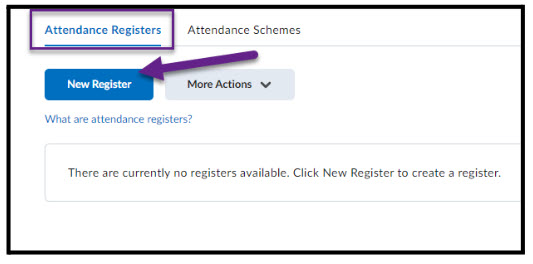
- Select “Attendance Register” and then click “New Register.” This is where you will create the attendance roll.
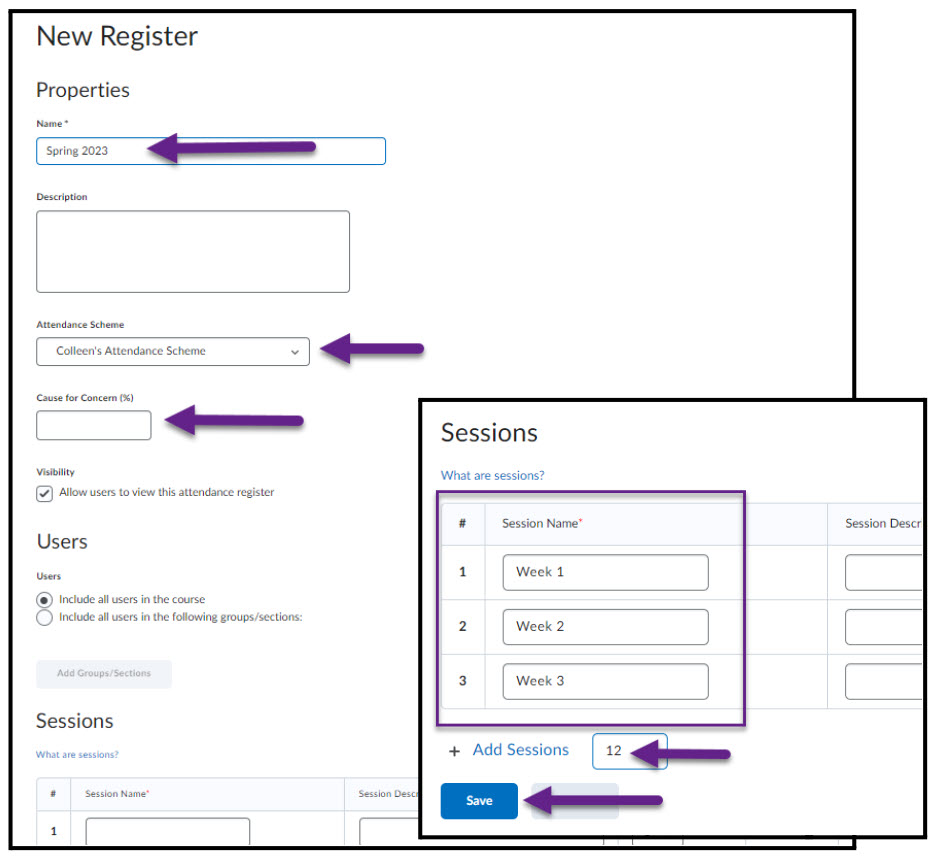
Complete the register, add the Name, Attendance Scheme, Cause for Concern %, and the Sessions. Think of the sessions as writing the class dates in a paper attendance book. You can add more sessions to meet your needs. Save, then close.
Taking Attendance
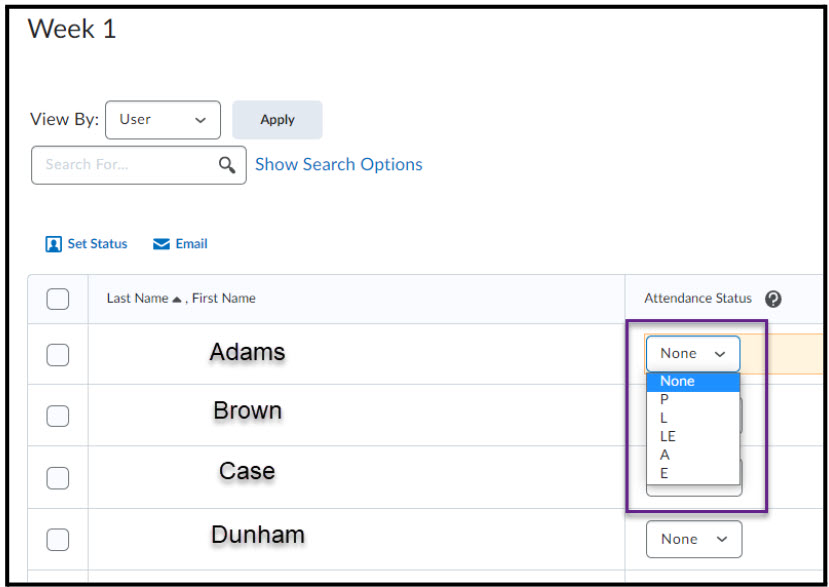
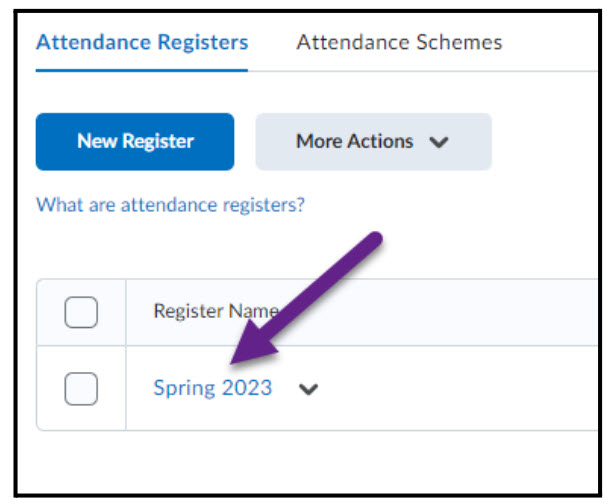
- Now you can take attendance. Click on the register name shown here as “Spring 2023.”
- To enter attendance, select the edit icon next to the session you want to mark. The icon is a pencil sitting on grid paper.
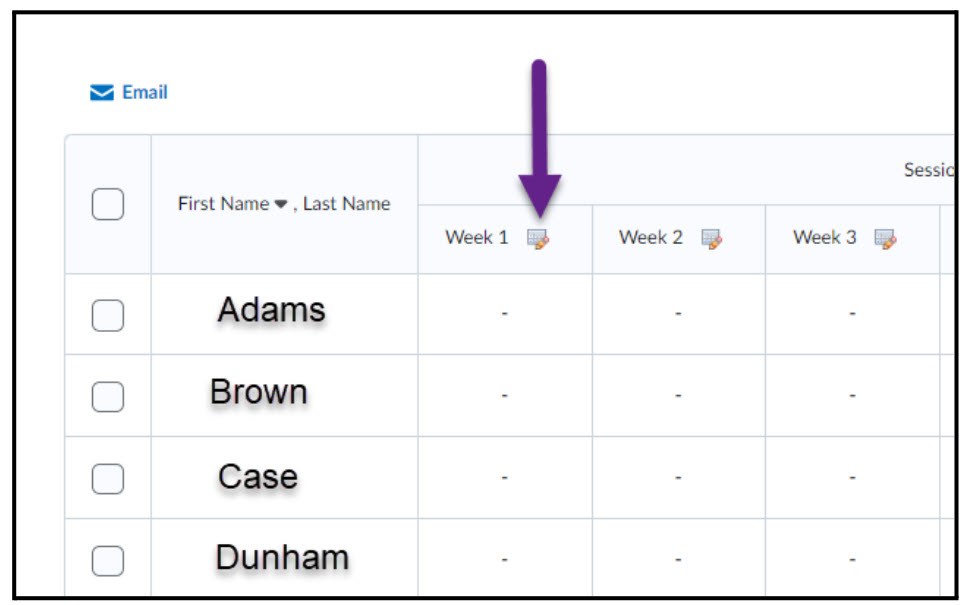
- Next to the student’s name select the attendance status for that session. Complete for all students, save, then close.